Monday, April 16, 2012

A quick lampshade slipcover

I have been doing a little springtime decorating in my home's entryway
using the many birdhouses that I have gathered over the years.


I was not happy with the color of this lampshade...


...then remembered this little bird print fabric in my stash.


I thought I would make a little slipcover for the shade
so I could go back to the original shade when desired.


First I traced around the shade on newspaper.
Because my fabric was directional and I wanted all the
birds to be right side up (not upside down as it went around the pattern)...
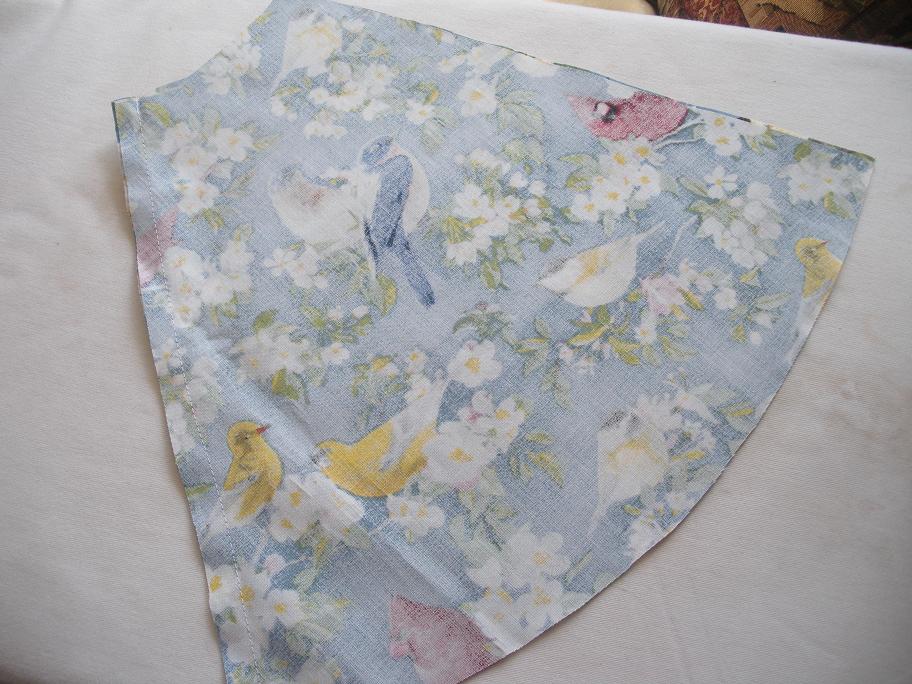

...I cut the traced pattern into four quarter panels, adding 1/4 inch
on the sides (for seams) and enough on the top and bottom
of the shade for turning under.  I pinned the pattern on the fabric
so that each panel had the birds sitting upright on the branches.
I then stitched the sides together, forming a circle.

I stitched 1/4 inch from the top and bottom. I find it much easier to
turn and press a hem with this guide, and it seems to help
ease in the fullness of the wider edge.


Press around the top and bottom,
turn again and stitch hem.


Here is the finished slip!


You can change the look of your lampshade to go with
any decor and be able to go back to the original at anytime!
You could embellish your slipcover with trims, ribbons, or beads,
but this fabric has such a busy print I left it as is.
Please come see how I decorated my entryway

Joining Kathy for
Home and Garden Thursday!

Thursday, December 22, 2011

Another Scarf

I fell in love with this gray linen scarf
that I saw on Pinterest.
source
Not having any linen in my stash,
I did come up with a bit of
gray Wool Flannel.


I stitched a length of it together


and crocheted an edge similar to the original


and for a touch of Christmas,
pinned it with my Pear Tree pin.

Just in time to wear to a sweet
Granddaughters ballet recital
as a Mouse in The Nutcracker!


Friday, December 16, 2011

Red Buffalo Check Scarf

I've had this classic Red Check flannel
fabric in my stash since last winter
(when big checks were popular!)
 I quickly cut and stitched this
scarf in less than five minutes.

Pulling out the threads to make the fringe ~
quite a bit longer!

Friday, December 2, 2011

The Burlap Wreath Gets a Little Christmas On!


You may remember this burlap wreath that I
made in October. I love the simplicity
and country style of it. The burlap 
looks as if it were cut right from the
feed sack! Perfect for those
harvest-y Autumn days
 here at the farm.

Now that Christmas is approaching and the
days are shorter and drab,
I wanted to add just a touch
 of festive color to cheer it
(and me) up! 


I used some plaid wired ribbon
that I already had. I
 made several little 'picks' of
the ribbon fashioned into
loops to mimic the looped
burlap, and fastened here and there.
Then I added a larger gathering
to the center of the burlap bow.


It still wanted something.
?
I have had this little German Glitter Banner
that I had recieved from Madai at
Wren Cottage a couple of years ago, and
thought it might be just the addition it needed.

The glitter is a bit tarnished with age now
but I think it added just the right touch!
Simple ~ Country 
Just like me! 


Yep! I like it
It brings me a bit of JOY!

Friday, October 28, 2011

Rustic Burlap Wreath

Using items that I already had,
I made a burlap wreath
for the front door
~
to go with my Crow Pillow !


If you would like to make one, too,
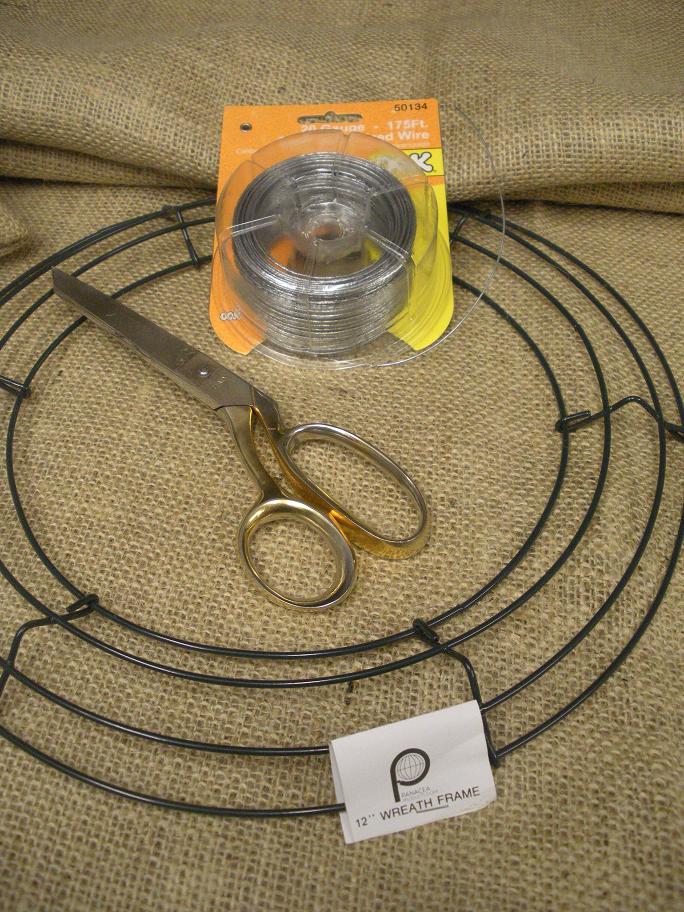
you will need:
2 yds. 54 inch wide burlap
12 inch wreath frame
wire for securing burlap to wreath frame


Cut 5 burlap strips 9inches wide
cutting from selvage to selvage through the burlap.
No need to be precise ~ it's rustic
so just eyeball it.

Use one of the strips to wrap around your wreath frame.

Secure with wire, leaving a tail (this will be the hanger)
 and do not cut wire from the package.


Take another of the burlap strips and loosely fold in half with
the seam at the back.
(It won't stay, but this is the general shape you want your strips.)

With the longest piece at the back, fold a section over
and pinch to make a piece that looks similar to
a half of a bow.

Secure with the long piece of wire
(still attached to the carton)
wrapping around the wreath frame.

Continue folding and wrapping burlap
with the wire to the frame
covering the wire of the
proceeding fold with each
new one added.
When you run out of one piece of burlap
continue in the same manner with consecutive pieces
until the entire frame is covered.

I alternated the direction of the folds ~
first to the right and the next one a little toward
the left to help conceal the wire and give
a bit of a fuller look to the wreath.

I used 4 strips of burlap to complete the circle of the
wreath. You may need more or less, depending on how full
you want it to look and your folding technique.
When your wreath is as full as you like and have
completely covered the frame, cut the wire a few inches
long and twist together with the initial piece left
for the hanger to secure the burlap.

Embellish however you like.
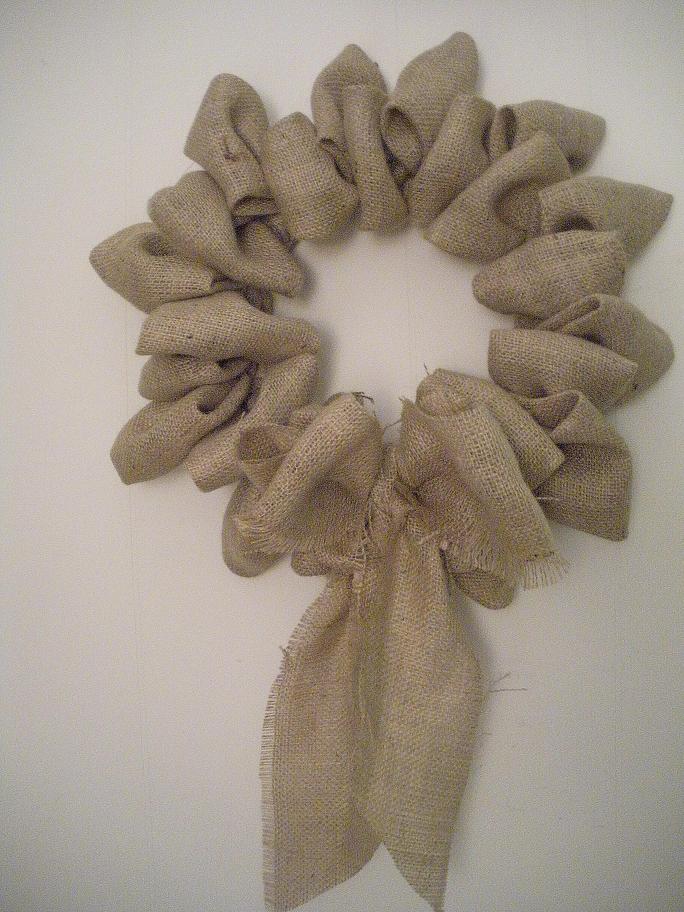
I added a burlap bow ~ a piece of burlap
folded in a bow shape...

...and knotted with a second long strand
over the bow and wreath frame.

My finished rustic burlap wreath!
Ready to hang on the door!
When it is daylight!
Tomorrow!

~*~

Joining


Wednesday, October 12, 2011

Rustic 'Crow' Pillow


I whipped up a simple, rustic pillow
with a crow silhouette for
my Autumn Porch bench.
Every farm has a crow or two, you know!
~*~
I found a free image online and printed it out
on card stock, then using an exacto knife, cut out
the image leaving a 'stencil' of the crow.
I placed the stencil on my precut burlap
and filled the image space with
black acrylic paint using a cheap
sponge brush.
Let the paint dry over night.
I lined the burlap with inexpensive muslin
and stitched the three sides with my machine.


I whip stitched closed the bottom of the pillow using a
large upholstery needle and some hemp twine.
This is a rustic outdoor pillow, after all!


 Here sits my little crow pillow...


eager to Welcome guests who blow in
with the Autumn winds!

~*~
Joining Tracie at Fishtail Cottage for
Outdoor Decor #3
and
My Romantic Home for
Show and Tell Friday!
and
Deborah Jean's Farmgirl Friday #28.
and
Kim at Savvy Southern Style for
Wow Us Wednesday!
and
Jami at An Oregon Cottage for
Well-Made Wednesday!

Monday, January 17, 2011

Morgan's Ballet Bag

She didn't have one.
Every little ballerina needs a
Ballet Bag
to hold shoes and other necessary items!
Morgan loves red!
Grandma loves Morgan!
Grandma made Morgan a
Red Ballet Bag!


Wednesday, January 12, 2011

In case you were wondering

Remember, you were guessing, in the previous post, what these gifts were that I was sewing.
Scroll down to see the finished product!


Classic and subdued

Flamboyant and bright


Any Season Robes!
Pattern by Cindy Taylor Oates
of Taylor Made Designs.


Thursday, December 16, 2010

Just a hint...

...of what I have been working on for Christmas!


Classic and subdued for Daughter #1


Flamboyant and bright for Daughter #2.


Do you like to guess what presents are at Christmas time?
Do you shake boxes and guess at the size and shape?
To prevent this at our home when the girls were young,
I would choose one style of wrapping paper for each person
but not put a tag on the gift.
Only I knew which ones went to whom!
They didn't know if it was their gift,
their sister's, or any of the
other recipients gifts!
They were only to be revealed on
Christmas Morning!


What do you think these are?
I would enjoy reading your guesses!
I will reveal them when they are finished!


Christmas Blessings to each and every one of you,
My Sweet Blogging Friends!


Wednesday, October 27, 2010

Because every man needs a hat...

no matter what his size!
~
Momma loves all things old fashioned,
so how about this vintage style bonnet?
This little blue and white plaid
hat is on it's way to
Utah!
I wonder if it will arrive before baby?

Lined in the softest blue flannel
to keep little ears and head warm
in cold winter weather.
Lace and embroidery are out for little boys
so what to embellish this little cap with?
How about a wee blue cording!

A chin strap is more boyish than frilly ribbon ties!
But, I think this cap is still sweet enough for
any baby boy, don't you?


Tuesday, October 19, 2010

They're the Cat's Meow!

What do you get when you take some
cute soft flannel...

...in bright colors and whimsical patterns...


...stitch some button holes...

...add some pockets...

and sew on a contrasting band?


Why, a couple of Cute Cats Jumpers,
of course!

They are the same, but different!

Oh! And we can't forget the Cats!


Made for the two sweetest little granddaughters
(because they love kitties)
in honor of their newest addition ~
(Click on his name to go meet this cute little unexpected bundle
of cuteness!)